How to Expand Images with AI: Outpainting in Practice
Turn vertical portraits into horizontal banners without cropping. Two outpainting tests show what works, what doesn't, and how to preserve the original.
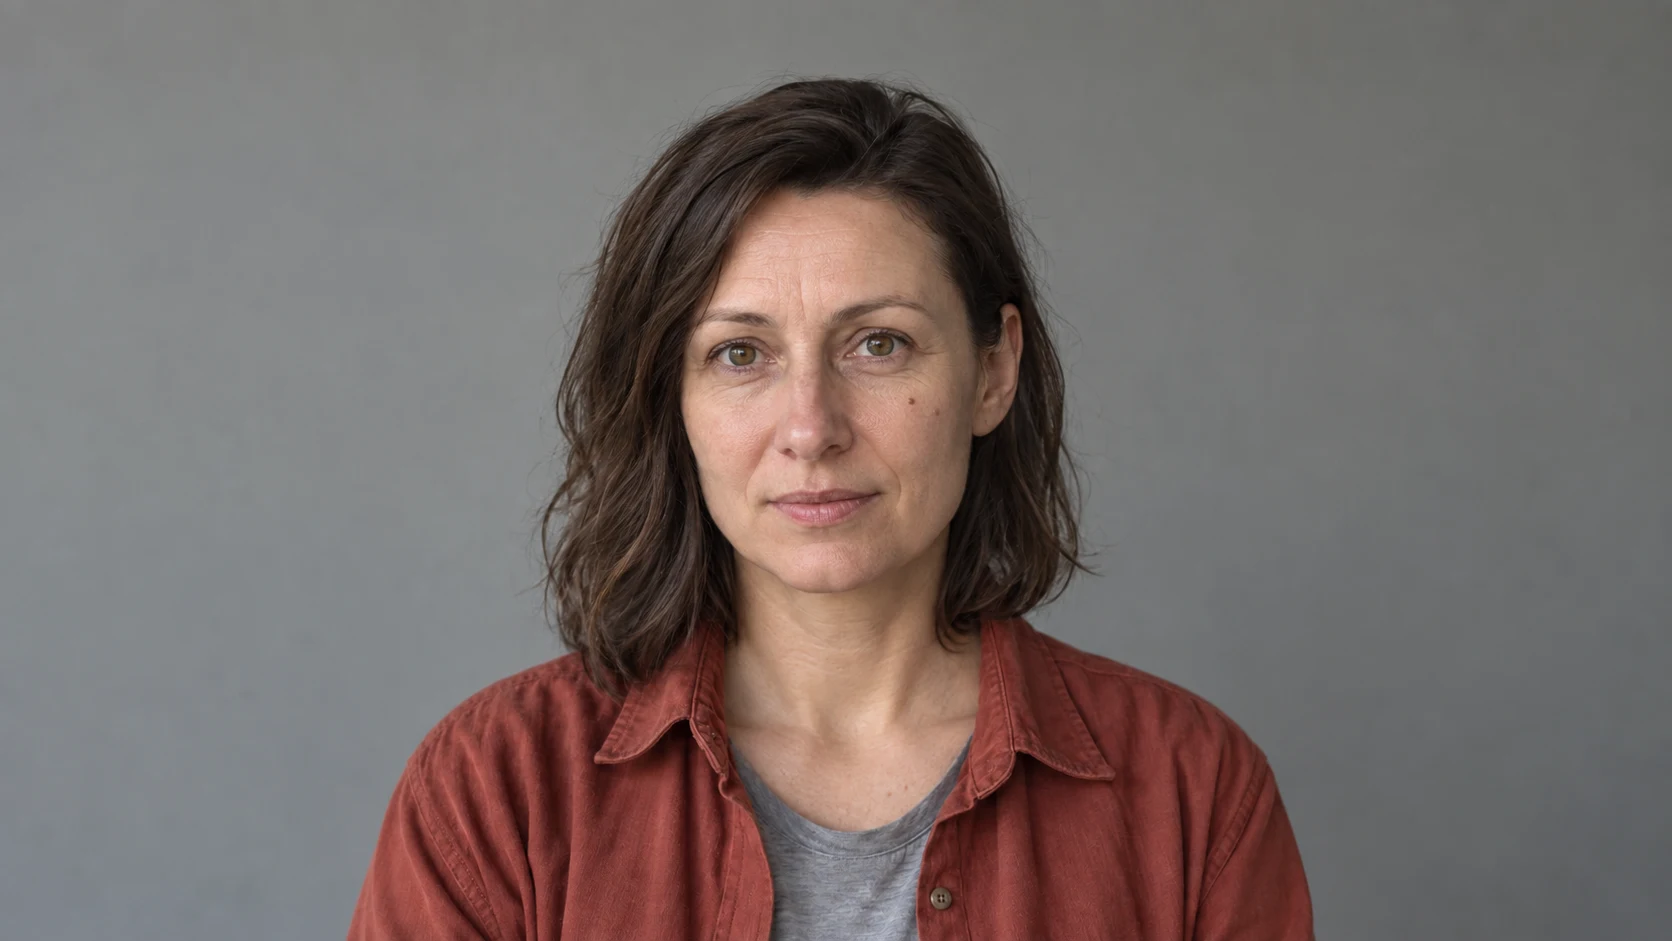
👁 118 reads
A vertical portrait is hard to fit into a horizontal banner. Simple cropping cuts off part of the head or shoulders, and stretching deforms the face. You can try image expansion: AI fills in what might have been outside the original frame.
We prepared two examples: a portrait against a plain background and a living room with furniture and perspective lines. In both cases, the goal was to add sides without rebuilding the center. The results show why simply achieving a wider format isn’t enough to call the edit successful.
What Is Outpainting
Outpainting generates content beyond the boundaries of an existing image. The model receives material to which it must match new fragments: color, light, texture, and perspective. In a portrait, this might be a continuation of the wall; in an interior, floors and furniture.
You need to distinguish expansion from redrawing the entire scene in a different format. Both results may look similar, but only the first accomplishes the task of preserving the original photograph. That’s why we also compare the central area, not just the new sides.
How to Prepare the Prompt
Attach an image and specify the direction of expansion. Provide the target aspect ratio, protected elements, and what may appear in the new area. For a simple portrait, continuing the background and shoulders is enough; there’s no need to add an entire interior.
If the editor allows you to expand the canvas and mark an empty area, apply generation to exactly that fragment. The prompt itself about preserving the center is an instruction, not a technical lock on its pixels. The input materials below are synthetic and serve for demonstration.
1. Portrait: From Vertical to Horizontal Frame
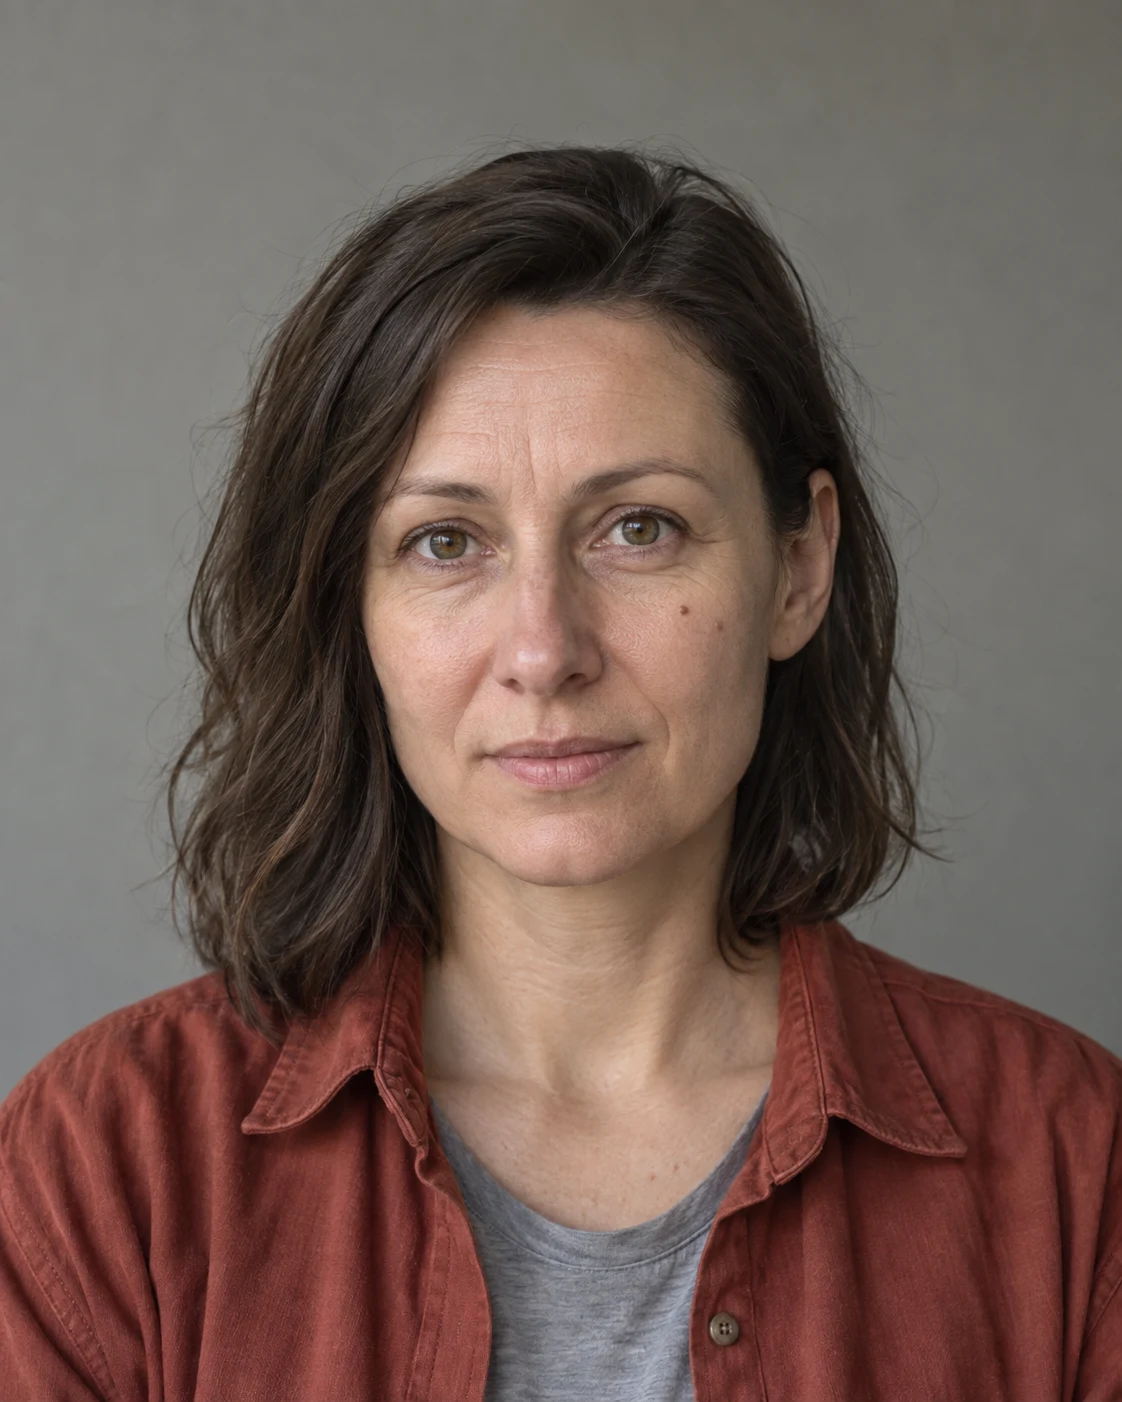
Prompt to copy:
Expand the attached vertical portrait to horizontal 16:9 by generating the left and right sides. Preserve the original central area, face, expression, head proportions, shirt, and lighting. Add only a continuation of the gray wall and shoulders at the edges. Do not crop the top or bottom of the original. No text, frame, new props, or retouching.
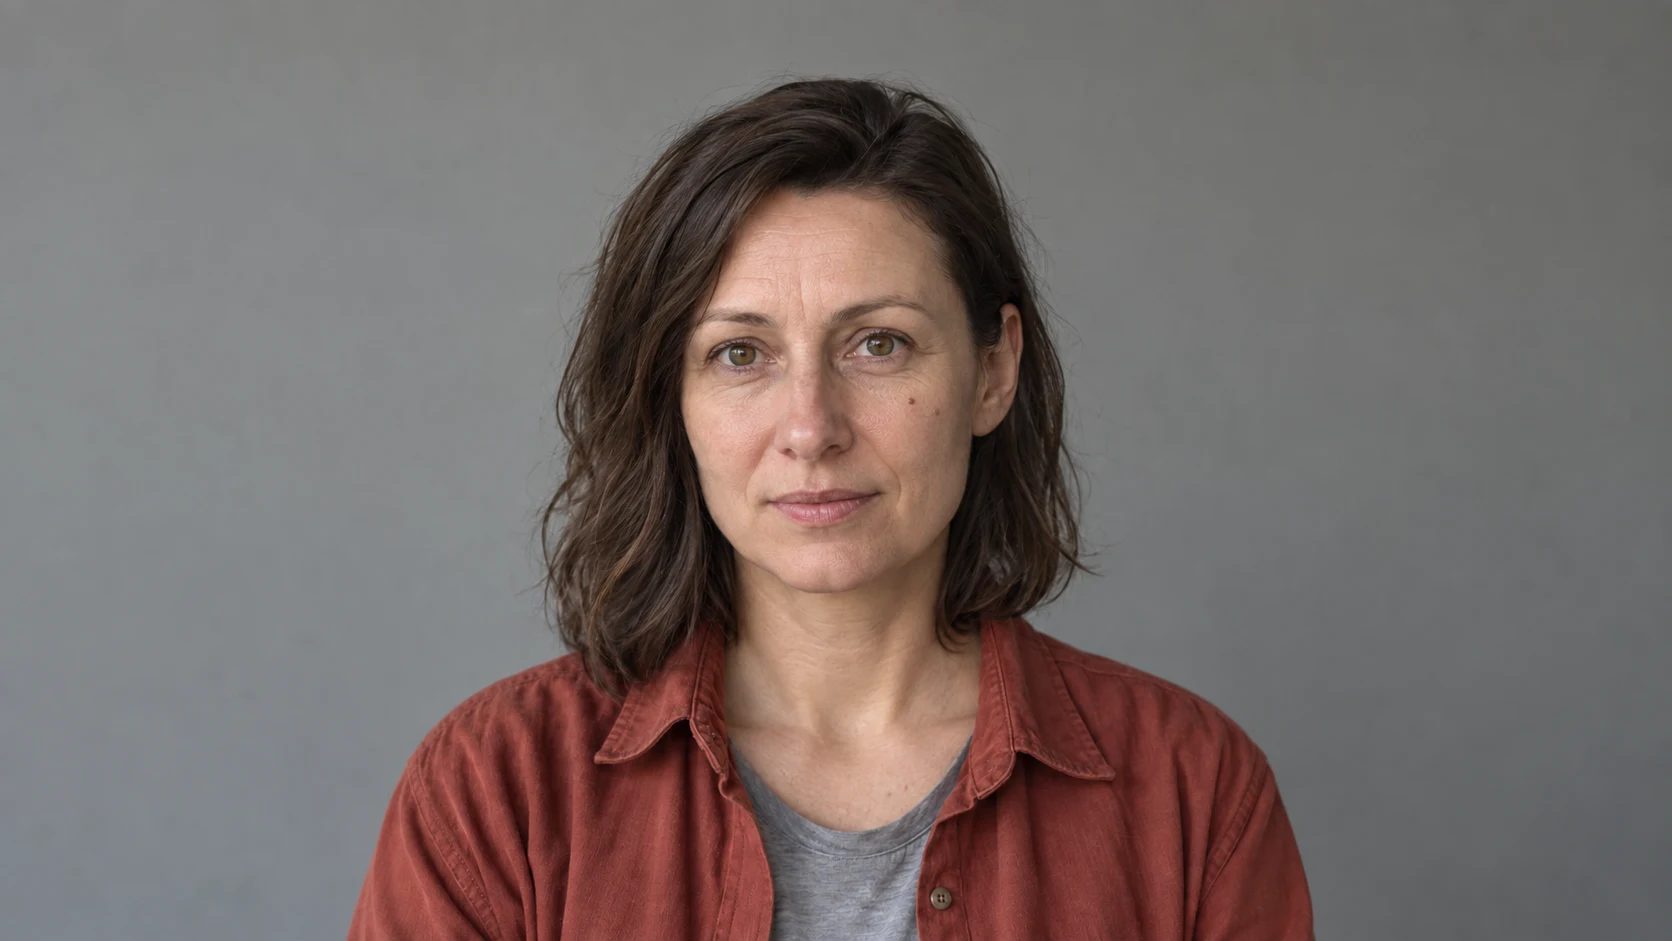
The horizontal image continues the gray background and preserves the general appearance of the face and shirt. However, the figure is positioned differently relative to the edges. This is a visually coherent result, but not proof of pixel-by-pixel preservation of the original center.
2. Living Room: Attempting Expansion to 21:9
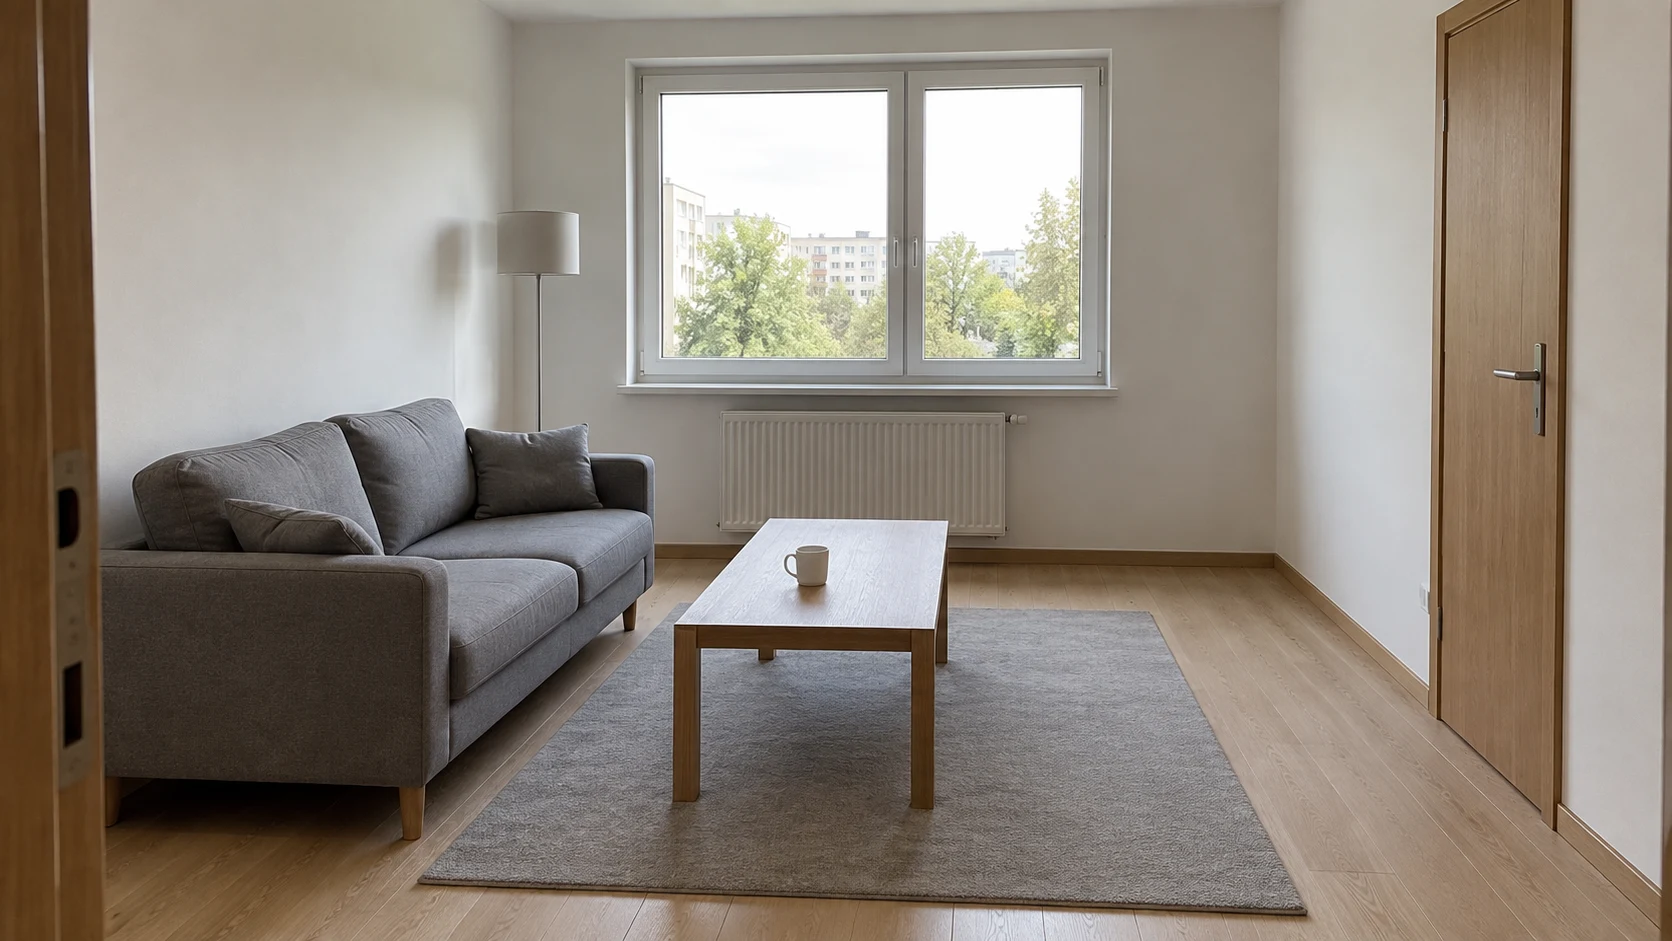
Prompt to copy:
Expand the attached room photograph horizontally to very wide 21:9 format, generating only the sides. The original central area must remain unchanged: window, door, radiator, sofa, table, white mug, lamp, and perspective. On the sides, continue the visible walls and floor. Do not add windows, doors, or furniture. Do not move the camera, do not crop the top or bottom, no text.
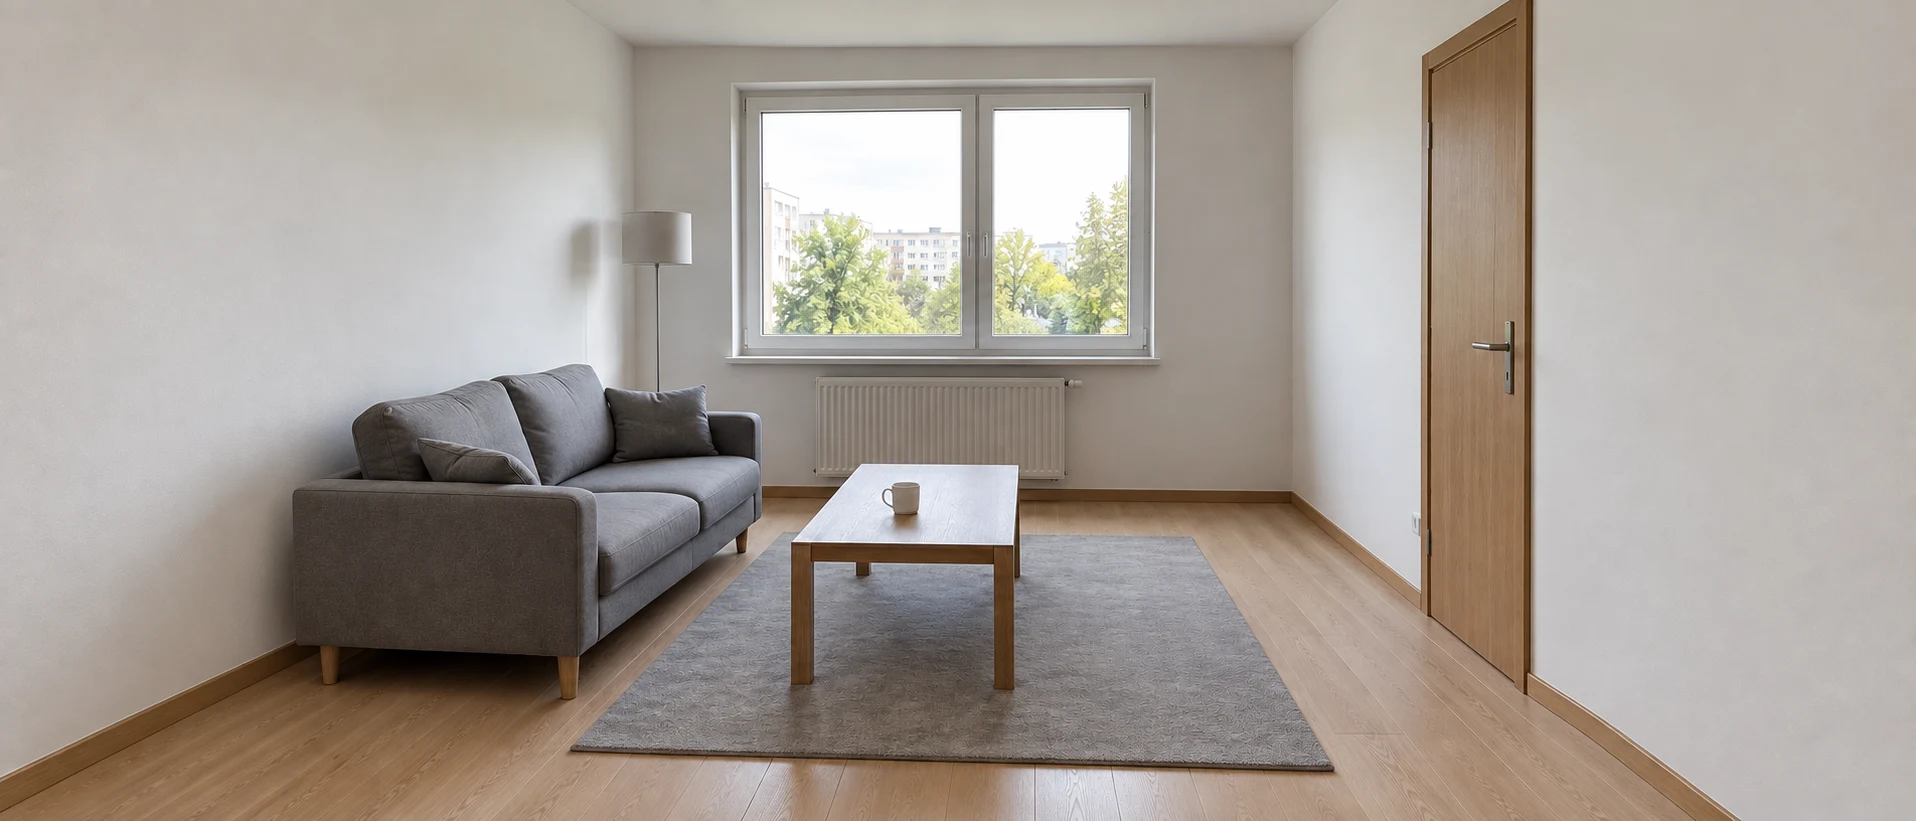
The format is wider, but the scene has been reorganized. Part of the door frame on the left edge has disappeared, and the relationships between furniture and the window to the image edges have changed. The instruction to add only the sides was therefore not strictly executed.
What to Check After Expanding an Image
First compare the center: face, clothing, text, or fixed elements of the room. Only then examine the new edges. A good wall color doesn’t compensate for a changed nose or shifted window.
In a portrait, check the shoulder line and hair at the expansion boundary. In an interior, trace baseboards, floorboards, and table edges. They should continue existing directions. A change in the angle of these lines can reveal a new perspective, even if the whole looks plausible at first glance.
Why Background Matters
A uniform background provides fewer points that need to be connected. A gray wall mainly requires matching tone and light. A room contains far more dependencies: walls meet the floor, a table obscures a rug, and a window determines the direction of lighting.
New fragments remain the model’s proposal. They don’t show what was actually outside the photograph. In a photo documenting an apartment, this difference matters: an attractive wide frame may suggest space that wasn’t there.
How to Limit Unwanted Changes
If the program supports a mask, protect the original area and generate only the missing sides. If you’re working only through conversation with the model, return to the input file and name the change you noticed. Further editing an already rebuilt room may solidify it.
Don’t add changes to time of day, style, or furnishings to this correction. The more tasks at once, the harder it is to determine whether the model actually preserved the original.
Google · Your sourcesQuantslant higher in your Google - one clickAdd to preferred sources →When I Would Use This Method
Most readily for a portrait against a plain background or graphics that lack space next to the main object. With architecture, I would treat the result more cautiously and compare it point by point with the input.
In the tests shown, the portrait is closer to the intended effect, and the living room reveals a change in composition. This is a useful boundary: a wider file doesn’t yet mean faithful image expansion.

More on this from QUANTSLANT

 magazine·Why AI Can’t Tell If You’re Making a Vaccine or a WeaponThe same knowledge that helps develop vaccines can create bioweapons. We explain why AI models can't tell the difference and what it costs all of us.