Film Grain Effect in AI: 35mm Look & 7 Tests
We asked AI for color negative film and got a blue face. Ready prompts, test results, fine and coarse grain, light leaks, and fixing the color inversion error.

👁 117 reads
We asked AI for a color 35mm negative effect and got a blue face and a black mug. The model took “negative” literally. Only a prompt about a finished, positive print gave the right direction. This guide shows the film grain effect on a single photo: subtle grain, stronger texture, light leak, black-and-white variant, and the point where aging destroys detail.
How to Create a Film Grain Effect on a Photo
Start by deciding what should change. If you want grain and color, leave the people and interior unchanged. If you want to rebuild the scene for a different decade, that’s a separate task. In these tests, the style affects the image appearance, not the subject’s age or the kitchen’s historical accuracy.
- Keep the original and upload it to a tool that supports image editing.
- Paste the subtle variant or choose exactly one effect from the examples.
- Adapt the description of protected elements to your own photo.
- Open the result at full size and check grain on the face, in shadows, and on uniform surfaces.
- For the next attempt, return to the original. Multiple edits of the previous result can accumulate changes.
Source and Test Method
All images below were created in an editorial test on September 16, 2026, in an image generation and editing tool available in that session. They are not stock photos or scans of real old photographs. The input image also depicts a fictional person generated by AI. Each edit was run from the same input image with a separate prompt. Results show these specific tests; another run may look different.

Prompt used to prepare the input image (tested in Polish)
Generate a realistic contemporary reference photo for an AI editing test. Fictional adult woman around 35 years old with short brown hair, in a plain dark green sweater, sitting at a wooden table in a bright ordinary kitchen. On the table is a white mug and a blue bowl with three apples. Visible hands holding the mug. Natural daylight from a window on the left, neutral white balance, clear skin texture without retouching. Horizontal frame, from the waist up, ordinary phone photo, not a fashion shoot. No grain, frames, text, watermarks, retro styling, or face blur. This is a fictional AI-generated scene, not a photo of a real person. (translated from the Polish original)Translation: Generate a realistic contemporary reference photo for AI editing test. Fictional adult woman about 35 years old with short brown hair, in plain dark green sweater, sitting at wooden table in bright ordinary kitchen. On table is white mug and blue bowl with three apples. Visible hands holding mug. Natural daylight from window on left, neutral white balance, clear skin texture without retouching. Horizontal frame, from waist up, ordinary phone photo, not fashion shoot. Without grain, frames, text, watermarks, retro styling and face blur. This is fictional AI-generated scene, not photo of real person.
1. Fine Grain and Calm Color
The first variant was meant to change the photo’s character only slightly. On a small thumbnail, subtle grain may be almost invisible. That’s not a reason to immediately crank up all effects: view the full image.
Edit the attached photo, giving it a subtle look of a scanned color 35mm negative: fine irregular grain, softer highlights, slightly raised blacks, and calm colors. Preserve natural skin tone and recognizable facial texture. Do not change the person, age, hairstyle, hands, white mug, three apples, background, or framing. Without border, text, scratches, dust, light leaks, and date.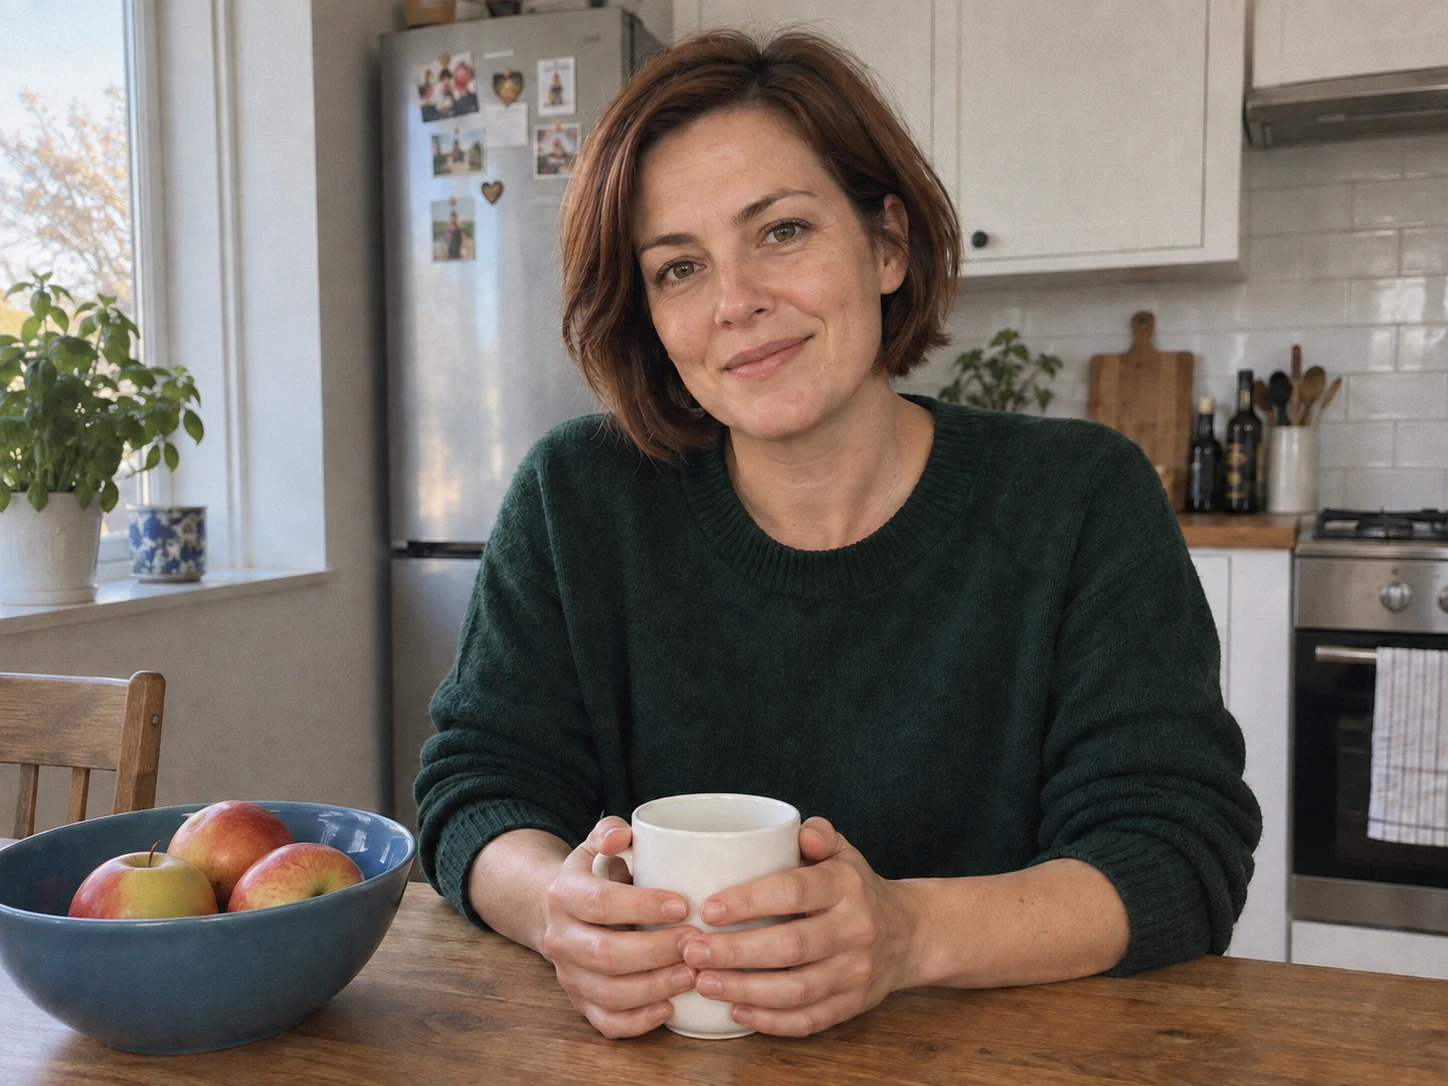
2. Stronger Grain Without Dust and Scratches
Separate grain from dirt. You may want pronounced texture but not scratches running through eyes and mouth. In this prompt, those elements are separated so you can evaluate one effect.
Edit the attached photo: give it the look of a scanned color 35mm negative with pronounced coarser grain. Grain should be irregular and present also in shadows, without adding dust, scratches, or spots. Colors slightly muted, face legible, without smoothing skin. Without border and light leaks. Preserve the same adult person, their age, face, hairstyle, hands, sweater, white mug, three apples, kitchen, and composition. Do not add people, text, or logo.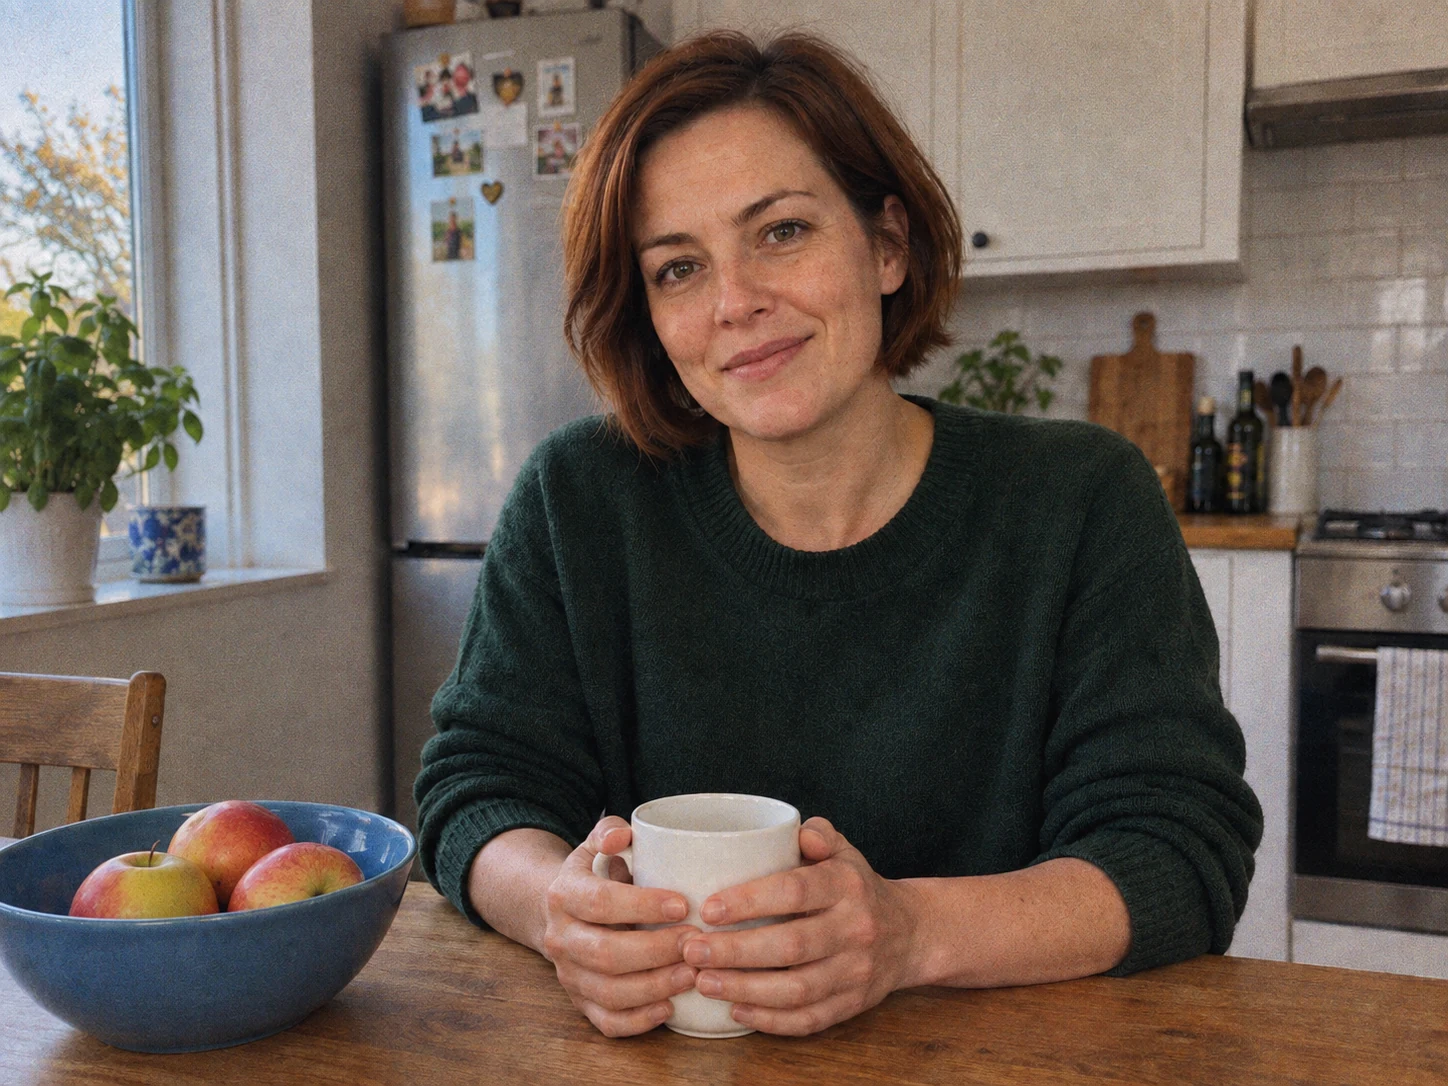
3. Failed Attempt: Model Inverted Colors
This is the exact prompt that gave the wrong result. We’re leaving it to show the trap of the word “negative.” We wanted the look of a finished photo from film but received color inversion. The orange strip at the edge doesn’t fix blue skin.
Edit the attached photo in the style of a color 35mm negative. Delicate fine grain and soft highlights; add subtle orange-red light leak only at the left edge of the image, on a narrow strip no larger than one-tenth of the width. Leak must not overlap face or hands. Without border, scratches, and dust. Preserve the same adult person, their age, face, hairstyle, hands, sweater, white mug, three apples, kitchen, and composition. Do not add people, text, or logo.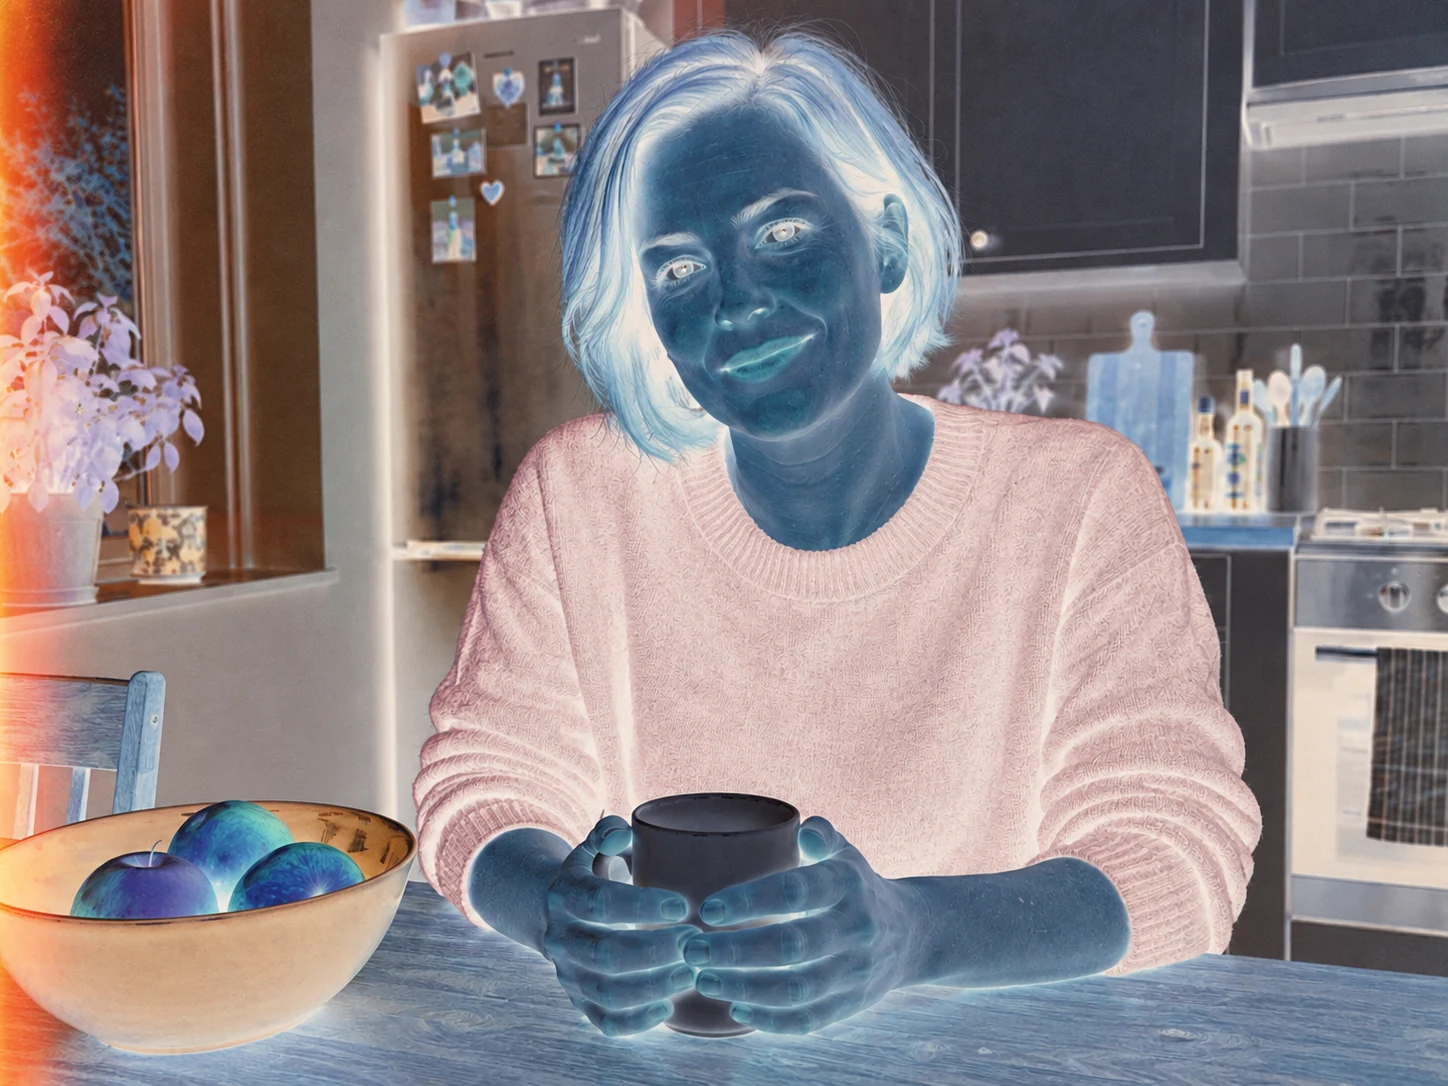
4. Fix: Finished Print, Normal Colors
We attached the original image again, not the failed edit. We specified normal skin, mug, and sweater colors and that we want a finished positive print. This prompt change solved the problem in this test.
Edit the attached photo so it looks like a FINISHED POSITIVE PRINT from 35mm film. Normal, non-inverted colors: natural skin, white mug, green sweater. This should not be a view of a negative or color inversion. Fine grain, soft highlights. Subtle orange light leak only at the left edge, maximum one-tenth of width, away from face and hands. Without border, scratches, dust. Preserve the same adult person, age, hairstyle, hands, green sweater, white mug, blue bowl with three apples, and kitchen layout. Without additional people, text, and logo.
5. Black-and-White Film Without Sepia
The colorless version should still separate light and dark parts of the face. Simply removing saturation says nothing about how midtones are rendered. In the prompt, we indicate mug, hands, and sweater texture as control points.
Transform the attached photo into a finished black-and-white photograph with fine 35mm film grain. Legible midtones on face and hands, bright mug with preserved texture, smooth transition of highlights and shadows. Do not make sepia, do not add scratches, borders, or spots. Without de-aging and smoothing skin. Preserve the same adult person, age, hairstyle, hands, green sweater, white mug, blue bowl with three apples, and kitchen layout. Without additional people, text, and logo.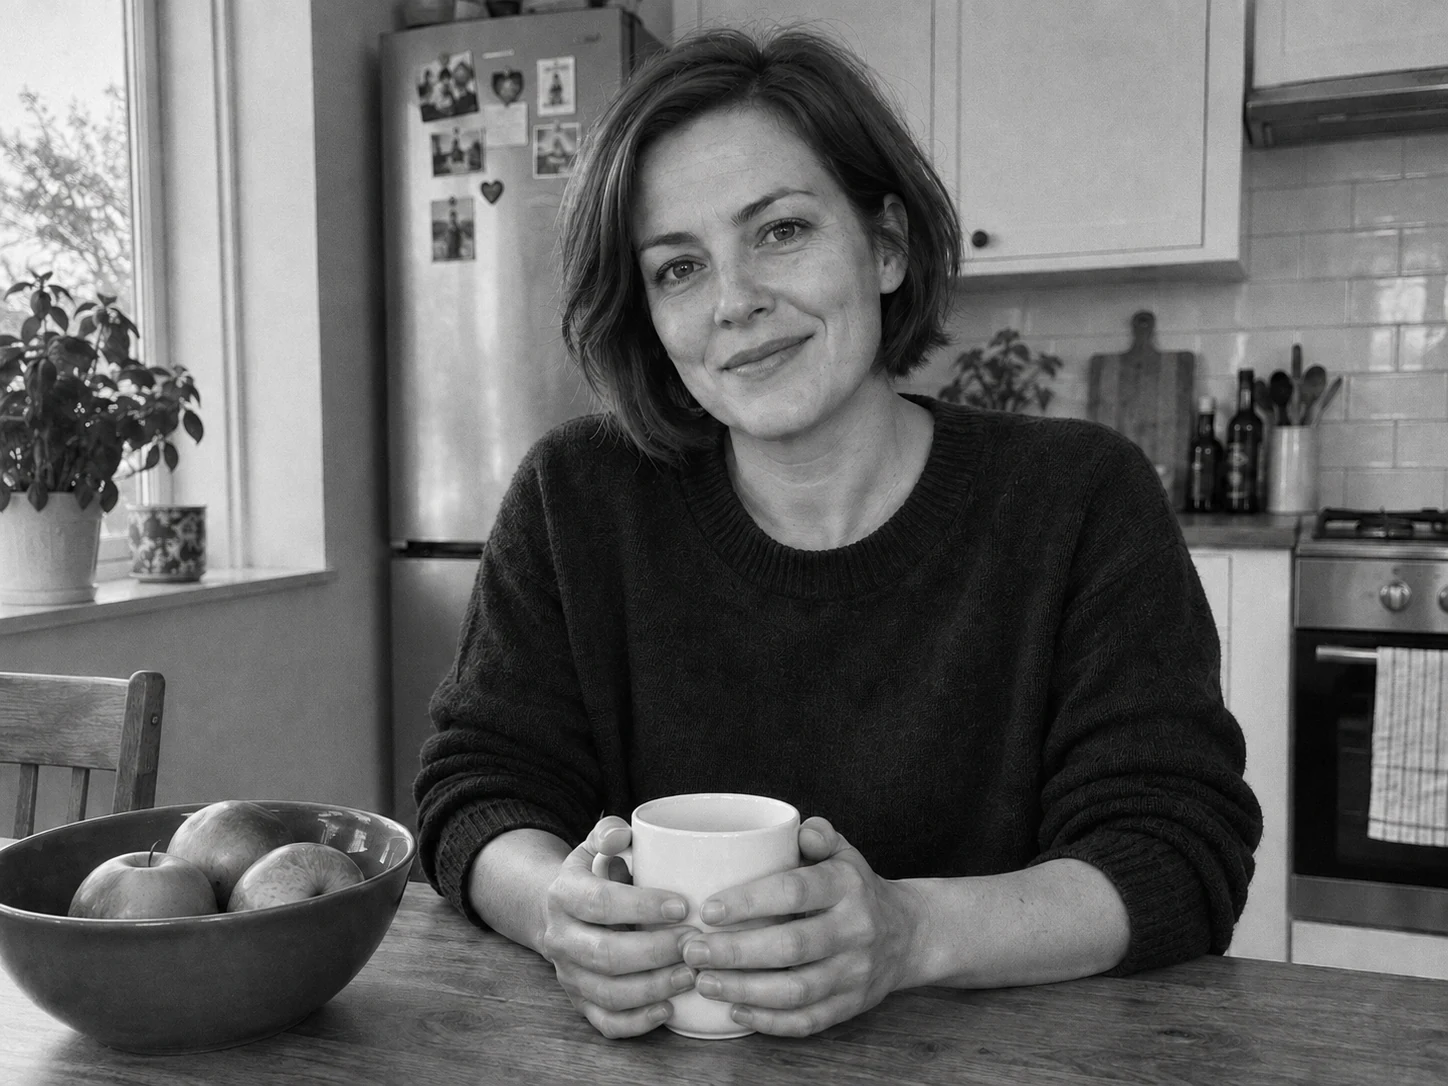
6. Excessive Aging: When Effect Obscures Photo
This variant deliberately combines heavy grain with scratches and fading. It serves as a boundary, not a ready recipe for every portrait. If the goal is a legible face, remove scratches from the prompt and return to fine grain.
Edit the attached photo as deliberately exaggerated stylization of old film. Very coarse grain, heavily faded colors, and numerous small scratches across entire surface, also on face. It should be visible that excess effects make details difficult to read. Normal positive colors, do not invert colors. Without border. Preserve person, their age, hairstyle, hands, mug, bowl with three apples, clothing, and kitchen layout. Without new people, text, and logo.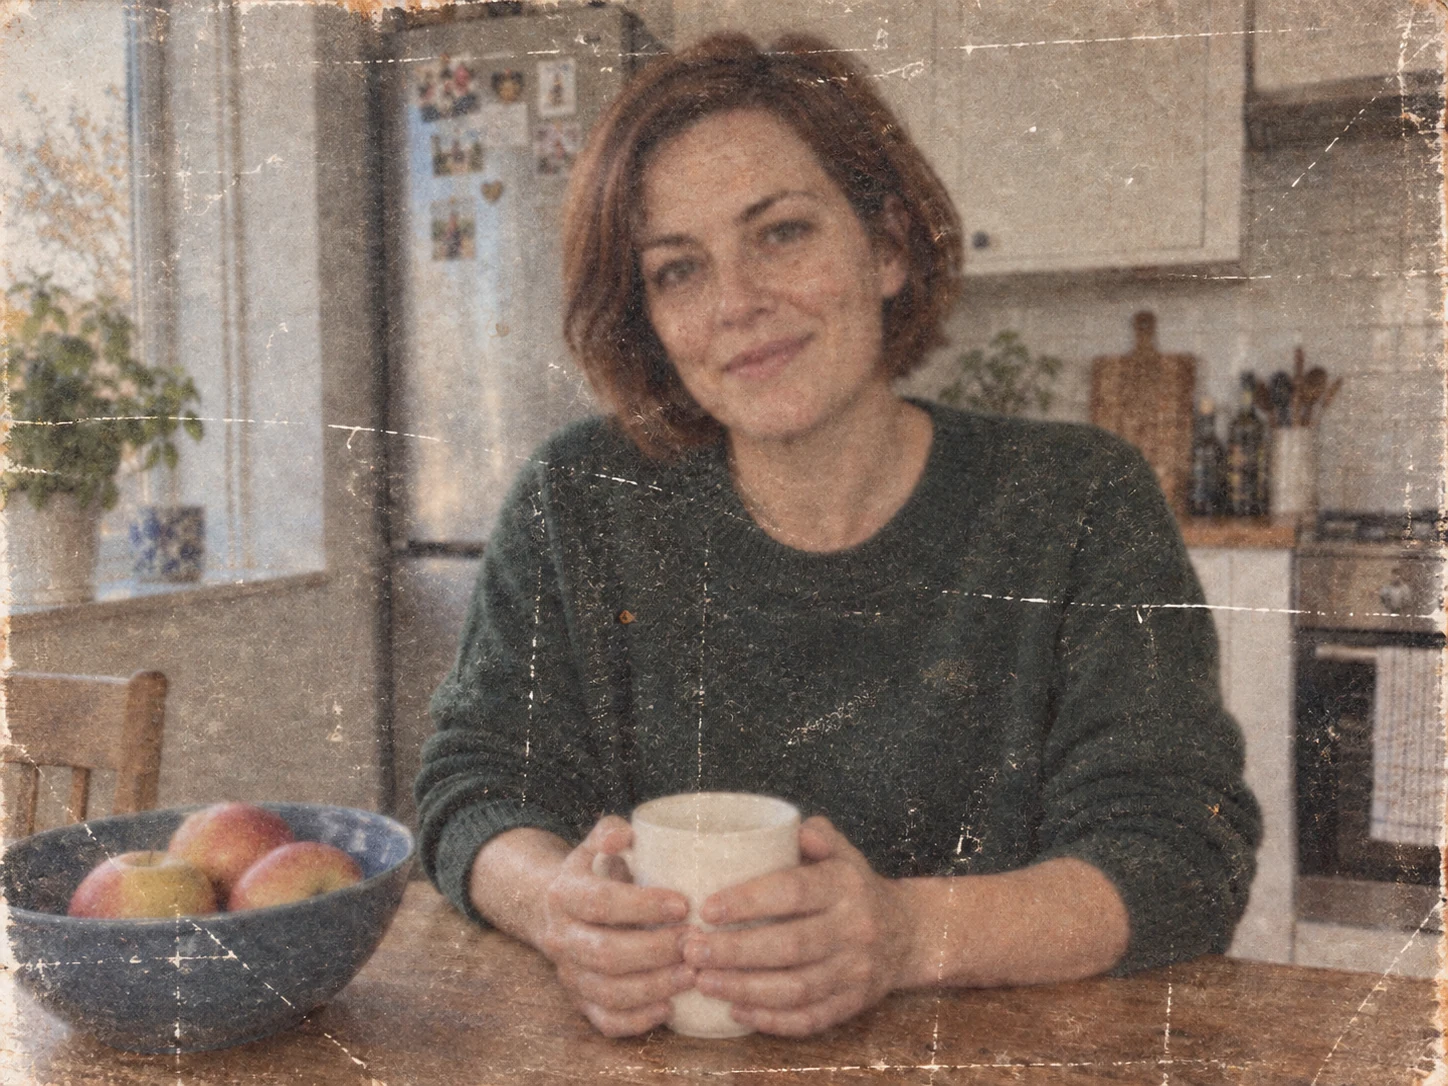
7. Ready Prompt for Economical Film Effect
This is a starting variant if you don’t want pronounced damage. Fine grain and soft highlights are enough to evaluate direction. Check your own photo also after export, because compression and downsizing can change visibility of fine texture.
Edit the attached photo like a finished color photographic print from 35mm film. Normal positive colors, natural skin, subtle grain visible mainly after enlargement, slightly softer highlights on mug and hands. Preserve clear details of face and sweater. Do not add sepia, color cast, scratches, dust, borders, light leaks, or blur. Effect should be economical. Preserve person, their age, hairstyle, hands, mug, bowl with three apples, clothing, and kitchen layout. Without new people, text, and logo.
What Film Filter Cannot Prove
Adding grain does not turn a digital image into a scan of real film. It also does not prove how the same frame would look from a specific camera. In these prompts, we deliberately do not attribute results to a specific emulsion brand. We try to achieve the described appearance, not conduct a calibrated test of photographic equipment.
If the face must remain identical, start with an editor that applies corrections and texture to existing pixels. Generative editing can rebuild details. For borders and soft prints, there is a separate guide about Polaroid effect. Meanwhile, clothing, hairstyles, and scenography belong to styling photos for the 1980s.
Google · Your sourcesQuantslant higher in your Google - one clickAdd to preferred sources →Frequently Asked Questions
What is film?
In photography context, it refers to light-sensitive material on which a camera records an image. In this guide, “film effect” means digital stylization of a finished image: grain, how highlights and colors are rendered. We do not use real photographic material here.
How do you develop photos from film?
Real film requires proper development process, and then you can prepare a scan or print. An AI prompt does not perform this process and does not recover an image from an undeveloped roll. If you have physical film, you need a photo lab, not a filter from this article.
Why did AI make a negative instead of film effect?
In the shown test, the word “negative” was interpreted as color inversion. It helped to reuse the original and add “finished positive print, normal colors, without color inversion.” This is the result of one correction, not a guarantee of every model’s behavior.

More on this from QUANTSLANT
 news·OpenAI Develops AI Tools for Seniors: Everyday ApplicationsOpenAI is adapting its AI tools for older adults, removing technical barriers and creating practical applications for communication, health, and daily tasks.